
Category Archive: Learners Permit Tips
Hill Hopping; Dangerous And Stupid
March 14, 2014
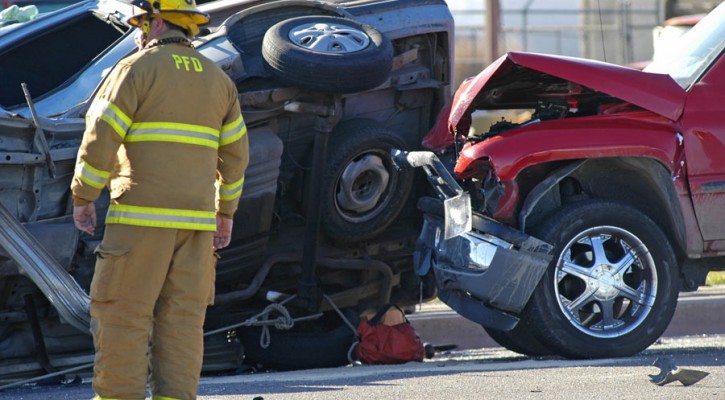
Law enforcement authorities across the nation are warning against an incredibly dangerous practice known as “hill hopping” that is growing in popularity among young drivers. As the name implies, the practice consists of teen drivers driving over hills at a high rate of speed and going airborne as the vehicle crests the hilltop.
While this practice isn’t really new, videos posted on YouTube are helping to spread the word and encouraging more young drivers to give it a try. The practice is dangerous for a number of reasons:
-
Most of these hill hopping attempts occur on rural, two lane roads. The National Highway Traffic Safety Administration (NHTSA) lists two lane country roads as the most dangerous and deadly type of road. Two lane country roads are normally narrow and give no room for escape from an emergency situation. Intersections with other roads or driveways can be hidden by hills or trees and drivers entering the road may, at first, consider the roadway to be clear only to pull out and encounter a vehicle traveling over the crest of a hill at a high rate of speed.
-
Obviously, crashing to the ground after going airborne can’t be good for the car, the damage done to the vehicle occurs in those parts of the car that are most critical to vehicle control. The suspension system can be damaged leading to less control in curves or turns. The steering mechanism can also be damaged or broken leading to total loss of control.
-
Most people don’t realize that the tires are the most important control device on the vehicle. The steering wheel and brakes don’t do much good if the tires aren’t in contact with the road. One hill hopping YouTube video shows an older model Buick cresting a hill at a high rate of speed and remaining airborne for more than two seconds and traveling more than 50 feet before crashing down on its rear wheels. Once the tires lose contact with the road surface, there is no way to control where and when the vehicle will land or at what angle/attitude.
-
Hard landings can throw the driver around allowing him or her to lose their grip on the wheel or to lose contact with the foot pedals at a time when control is most critical. If the driver and passengers aren’t wearing seat belts, they can be violently thrown into the dashboard, against the windows, or ejected from the vehicle.
Parents need to drive home the idea that thrill rides need to be limited to amusement parks and have no place on the roadway.

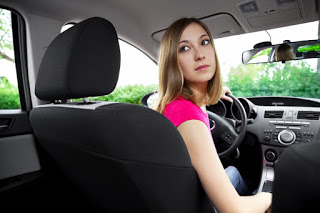
Worried About Passing Your Driving Test?
October 2, 2012
How much have you practiced your driving skills? The GDL Laws of most states require you to get a learner’s permit or instruction permit first before you get your driver’s license. This is the time when you practice your driving skills either with a parent or driver education instructor. Most states require you to have a minimum of 40 to 50 hours of driving practice during the learner’s permit stage. It is suggested to use a driving experience log so you practice all the maneuvers you’ll be tested on. Here is an example to PRINT.
When you are ready to get your license remember the following driving skills as this is what they will be testing you on during the road test:
- Obey the traffic signals and signs
- Avoid hitting the curb or cones while parking
- Three point turn is the most comment reason for failing the exam – so get lots of practice during your learner’s permit phase especially on narrow streets!
- Put on your seat belt before starting the vehicle.
- Properly yielding to other traffic when changing lanes.
- Using your turn signal when turning, changing lanes, or turning into or backing out of a parking space
- Safe driving around school buses and school zones.
- Maintain a two to three-second following distance.
Driving Lesson: Road Parking Tips
May 20, 2012
Parking is as much an important part of driving as driving itself. Learning how to park in different circumstances is an important part of the road test. The road test examiner may ask you to park in a parking lot space, to parallel park, or both. You need to know the proper procedures:
Signaling – Remember that you should signal your intentions at all times; even in a parking lot. Turn on your turn signal before you begin your turn into a parking space to let other drivers know what direction you are turning in. You should also signal as you exit the space to let other drivers know what direction you will be going in as you exit the space.
Parking lot– The examiner may point to a specific parking spot in the parking lot for you to park in. The spot may be lined on either side with orange cones to represent cars in the adjoining spaces. If you were to hit one of the cones, it will mean an automatic failure. Practice parking in a space by looking toward the center of the space before you begin your turn and keeping your eyes on the center of the space as you pull into the parking spot. Don’t look at the hazards on either side; look at where you want to put your car. Keep practicing until it is second nature.
Parallel parking – The examiner will point out a spot and ask you to demonstrate your ability to parallel park and, just like in the parking lot, there may be cones in front and back representing the bumpers of other cars; you don’t want to hit them. Parallel parking is really easy but it takes a lot of practice. Pull up even and about two to three feet away from the vehicle in front. Turn your wheel all the way to the right and slowly start to back up. As you come even with the rear bumper of the car next to you, start turning your wheel to the left. Once you enter the space, adjust your car so that it is parked an even distance between the car ahead and the one in the rear. You should be no more than eighteen inches from the curb.
Parking on a hill – The examiner may ask you to demonstrate or explain the procedures for parking on a hill with or without a curb.
- Downhill with or without a curb – Parking facing downhill is easy. Whether there is a curb or not, you should always turn the front wheels to the right so that, if your brakes should fail, the car will roll off of the roadway.
- Parking uphill without a curb – Parking facing uphill without a curb means you should turn your wheels to the right. Just like parking downhill, if your brakes should fail, the car will roll off of the roadway.
- Parking uphill with a curb – This is where it gets a little different. When parking facing uphill with a curb, you want to turn your front wheels to the left, toward the center of the road. Once you have turned your wheels, you will want to back up just a bit until you feel the wheels bump up against the curb. In this case, if your brakes should fail, the car’s front wheels should jam up against the curb and prevent the car from moving any further.
Parking properly is easy but it does take practice. Make sure you practice each maneuver until it becomes second nature to you before you take your road test.
Need extra practice? Take our behind the wheel road test course. It’s 100% online and shows you exactly what the examiner will be looking for.
10 Most Confusing Traffic Signs
December 27, 2011
We all know that traffic signs do an important job: they tell us what exactly we can or can’t do on the road. But what if the signs were confusing? Sometimes this leads to funny stories afterwards, other times it leads to tragedy, as a misunderstood sign may sometimes lead to crashes.
These signs, wherever state they may show up, must be approved by the Manual on Uniform Traffic Control Devices (MUTCD). They create the standard by which all signs could be installed, maintained, and managed by road managers everywhere. The MUTCD is published by the Federal Highway Administration (FHWA).
Here then, is a list of some of the more … confusing traffic signs that are currently out there.
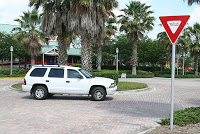
Yield – The red upside-down triangle sign, or sometimes, a simple verbal instruction to “YIELD”? It’s surprising just how many people get confused with this sign. The best way to describe it is it’s like a lighter version of the STOP sign. When faced with this sign, motorists should stop, give way to vehicles from another approach and then enter an intersection. These usually appear in smaller roads that don’t get enough traffic that they don’t necessarily need a STOP sign.
Runaway Vehicles Only – But what if you weren’t running away? This sign signifies that a runaway device is installed in an area. This is usually for trucks that have lost control — the device is usually a patch of road with sand or gravel, which helps vehicles come to a safe stop. The gravel or sand allows the momentum of the big vehicle to dissipate, allowing for safe stopping.
This Side of Sign – This sign signifies that something is allowed on “this side” or the side where the sign is installed. A variation of this sign may say “Parking This Side of Street.” This means that one may only park on that specific side and parking elsewhere may give you a parking ticket.
To Request Green Wait On [Bicycle symbol] – Blame it on confusing wording. This sign is supposed to give bikers a green light. This sign should be used in conjunction with traffic actuators that are adjusted to the amount of metal a bicycle has. If you’ll notice, there is a vertical line going on the top and bottom of the bicycle symbol. This means that bikers should position themselves in the designated marking for them to be detected by the actuators, giving them a green light. Some people confuse this as waiting for bicycles to ride by until they can get a green light.
Look <—-> – Looking left-to-right? Isn’t that what parents and preschool teachers teach kids before crossing the road? This sign is usually located near railways, signifying that motorists should be on the lookout for trains from both directions.
Truck Rollover – Nope this sign doesn’t signify the truck-wheelie lane — it only means that there is a slope nearby that truck drivers should be aware of, since there’s a big tendency for their vehicles to rollover.
Circular Intersection – Though it bears a striking resemblance to the recycling sign, this sign simply signifies that a circular intersection is coming up. Some circular intersections are different. In some cases, the entering vehicles have the right-of-way, while the vehicles inside the circle must yield. Sometimes this is reversed, so drivers have to do a bit of research before they go right through.
Stop Ahead – Stop vertically? No — this is simply a sign that signifies that there will be an oncoming stop. A sign for a sign, perhaps?
9% Grade – The roads aren’t trying to quantify your reading level or your abilities with math. This only means that there is an oncoming 9% Grade slope. Slopes on the road are measured in grades: consider that 9% is 9-feet off a hundred. It means that elevation may change from 5 (5% Grade) to 9 (9% Grade) feet.
DIP – Motorists have to wonder: how exactly are they going to “dip” their cars? This simple sign that says “DIP” means that there will be a dip in the road: parts of the road may go down, and then elevate right back up again.
Having trouble with learning the Roads of the Road and Traffic Signs? Take a DMV Practice Test to become an expert and pass your DMV written exam the first time.

Tips for Safely Changing Lanes During your Road Test
December 14, 2011
While taking your road test, the examiner may ask you to change lanes. Changing lanes is not a simple operation and the examiner will be looking to see if you follow all of the proper procedures to ensure that you change lanes safely.
Here are some tips on how to safely change lanes:
Assess the situation on the road ahead. Are there other vehicles trying to merge into your lane? Are there pedestrians ahead who are about to cross? Should you even change lanes? A big thing to look out for are vehicles in the lane you are about to change into flashing their brake lights or slowing down, it might indicate that there’s trouble in that lane and that changing lanes wouldn’t be worth it.
Use the rearview mirror to check motorists behind the vehicle. Check all of your mirrors before changing lanes. Is anyone behind you or in the far lane preparing to move into the lane you want to enter? Are there vehicles speeding up to get in on the lane you’re trying to change into?
Make a habit of always signaling other drivers about what you’re about to do on the road. Letting other motorists know your intentions will keep both you and them safe. This is especially true for changing lanes – drivers behind you have to make their driving decisions based on what you do. Make a habit of always giving signals for everybody’s benefit.
Check your blind spot before moving in. Before changing lanes, quickly turn your head with your chin over your shoulder to check your blind spots. It’s amazing how quickly a vehicle can move up and totally disappear in your blind spot.
When it comes to intersections, only change lanes before or after passing them. Remember, it is illegal to change lanes within 100 feet before or after an intersection.
For more practice consider taking a simulated behind-the-wheel online prep course offered through OfficialDMV.com.